A rechargeable flashlight that refuses to charge can be frustrating, especially when its indicator glows but the beam stays weak. The cause is often simpler than a failed battery: a loose cable, dirty contacts, an incompatible adapter, or a charging port blocked by grit. Still, guessing can waste time. Why can't I get my rechargeable flashlight to charge properly? The answer depends on its battery chemistry, charger requirements, and condition.
Battery performance depends on more than the cell alone. The International Energy Agency’s 2024 report, Batteries and Secure Energy Transitions, discusses how battery performance and safety depend on factors across the battery system. The U.S. Department of Energy’s National Blueprint for Lithium Batteries 2021–2030 also emphasizes battery quality and manufacturing. Neither report diagnoses flashlights specifically, so they provide context—not a substitute for the manufacturer’s instructions. That distinction matters.
This guide walks through five practical checks: testing another compatible cable and power source, cleaning contacts carefully, inspecting the charging port, checking indicator behavior, and considering battery wear. Look for a bent connector, a dusty socket, or a cable that works only at one angle. Small clues count. Stop charging if the flashlight becomes unusually hot, smells odd, or shows visible damage. I have seen troubleshooting advice jump straight to “replace the battery”; that is not always the right call. Start with the simple checks, follow the product manual, and avoid forcing a connector into place.
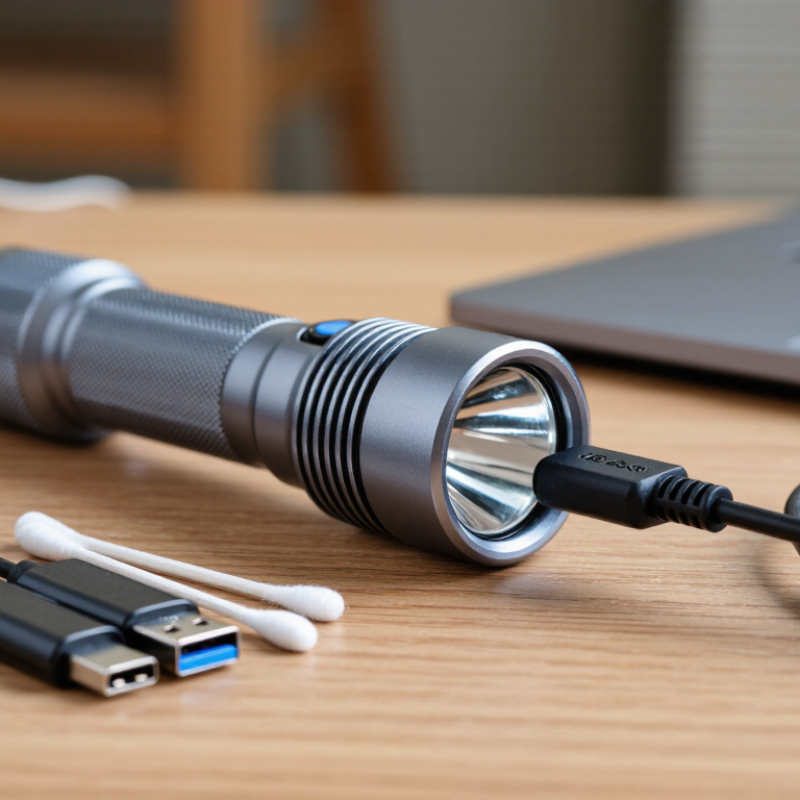
A rechargeable flashlight that stays dark may have a simple power problem. Test the outlet with another small device, then try a different wall socket. If the socket is controlled by a switch, check that too. I once overlooked a switched outlet; the cable got blamed for nothing. Small detail, easy to miss.
Inspect the charging cable from end to end. Look for bent plugs, loose connectors, fraying, or a plug that slips out of the flashlight. Test with a known-working cable that matches the flashlight’s charging port and requirements. The USB Implementers Forum’s USB Power Delivery 3.1 specification supports power levels up to 240 watts, but that is a maximum standard capability, not the amount your flashlight needs. Follow its stated input rating.
Check the power adapter’s output label, especially voltage and current, and compare it with the flashlight manual. A connector that fits does not guarantee compatible power. Try a suitable adapter and cable together, then leave the flashlight charging for the time specified by its maker. No change? Recheck the connection. Avoid forcing a loose plug; it may hide a damaged port.
| Fix | What to Check | What to Do | Expected Result | Safety Note |
|---|---|---|---|---|
| 1. Test the outlet | The wall outlet may be switched off, loose, or not supplying power. | Plug a working lamp or other small appliance into the same outlet. If it does not work, try a different outlet. | The flashlight’s charging indicator may turn on when connected to a working outlet. | Do not use an outlet that is hot, sparking, or visibly damaged. |
| 2. Inspect the charging cable | Look for cuts, fraying, bent connectors, or a loose fit at either end. | Disconnect the cable and try a compatible, undamaged cable with the correct connector and charging specification. | A damaged cable may prevent charging; a suitable replacement can restore the connection. | Stop using a cable with exposed wires or damaged insulation. |
| 3. Check the power adapter | Confirm that the adapter is plugged in and is compatible with the flashlight’s required input. | Try a known-working adapter that matches the voltage, connector, and charging requirements listed in the flashlight’s instructions. | If the adapter was the problem, the charging indicator should respond when connected. | Do not use an adapter with an unsuitable voltage or a damaged plug. |
| 4. Clean and reseat the charging connection | Dust, debris, moisture, or a partially inserted plug can interrupt contact. | Unplug the flashlight. Check the charging port and plug, remove loose dust with a dry, soft brush, and reconnect firmly. Let any moisture dry fully first. | A clean, secure connection may allow charging to begin. | Do not insert metal objects or liquids into the charging port. |
| 5. Allow time for a deeply discharged battery | A fully depleted battery may not show an immediate charging response. | Connect the flashlight to a compatible power source and leave it charging for the period stated in its instructions. Check the indicator again before use. | The charging indicator may appear after a short delay, depending on the flashlight and battery condition. | Disconnect and stop charging if the flashlight or battery becomes unusually hot, swells, or emits an unusual odor. |
Inspect the charging port under a bright light. Dust or pocket lint may block contact. Work slowly.
Switch off and unplug the flashlight first. Use a wooden toothpick or soft, dry brush. Never use a metal tool.
Wait until it is completely dry before connecting a cable. Charging too soon is not worth the risk.
Remove the battery as directed. Wipe loose residue with a clean, dry cloth. For stubborn dirt, use a barely damp cotton swab, then let everything dry fully.
Stop if you see leakage, swelling, deep corrosion, or damaged contacts. These signs may need professional service or battery replacement.
Check its label for chemistry, voltage, and polarity. A near-match is not necessarily safe. Heat and deep discharge can also shorten battery life.
Check for a cracked cable, loose socket, bent contact, or corrosion. A cable may have a hidden break near its plug.
The socket or internal charging board may be damaged. Have a qualified repairer test it, rather than bypassing the charging circuit. A light indicator can mislead.
If you’re asking, “Why can't I get my rechargeable flashlight to charge properly?” start by checking the simplest possibilities. Try a different outlet, inspect the charging cable and power adapter for damage, and make sure each connection is secure. Dust or residue on the flashlight’s charging port or battery contacts can also interrupt power, so clean them gently with a dry cloth and let everything dry before charging. If the battery is removable, take it out and reinstall it, checking that its positive and negative ends match the flashlight’s markings.
Next, confirm that the charger is compatible with your flashlight and follow the recommended charging method rather than leaving it connected indefinitely. If these steps do not help, the battery may have lost its ability to hold a charge, or a charging component may be damaged. Replacing a worn battery or having a faulty component repaired can restore reliable charging. Stop using any battery or charger that appears swollen, unusually hot, or visibly damaged.

 Geek Flashlight