How to Install and Adjust Electric Bicycle Lights Safely?

Time:2026-06-30 Author:Charlotte
0%

As the popularity of electric bicycles surges, ensuring rider safety has become paramount. Reports indicate that over 60% of e-bike accidents occur at night, often due to inadequate lighting. This statistic highlights the critical need for effective lighting systems on electric bicycles. Understanding "how to install and adjust electric bicycle lights for maximum safety?" is not just beneficial; it is essential.

Properly installed lights can significantly reduce the risk of accidents. Studies reveal that cyclists with functional lights are 70% less likely to be involved in a nighttime collision. However, many riders overlook the correct positioning and adjustment of these lights. This oversight can lead to diminished visibility. Adjusting lights to face the right direction is crucial to maximize visibility for both the cyclist and oncoming traffic.

Riders should also be aware of the limitations of their lighting systems. Regular checks and maintenance can prevent malfunctions. Research suggests that nearly 30% of cyclists do not routinely test their lights. This lack of diligence can be detrimental. In the end, a well-maintained light system is imperative for safe riding. Adhering to proper installation and adjustment techniques protects not only cyclists but also increases awareness among all road users.

How to Install and Adjust Electric Bicycle Lights Safely?

Choosing the Right Electric Bicycle Lights for Safety

Choosing the right electric bicycle lights can significantly enhance your visibility and safety on the road. Options range from front lights to rear flashers, each serving a distinct purpose. Bright, focused beams are essential for night riding. Rear lights should emit a steady glow or flash to alert vehicles. Ensure they’re easily adjustable, allowing for optimal light positioning.

Consider the lumens rating when selecting lights. Aim for at least 200 lumens for front lights to illuminate your path. Rear lights should have enough brightness to be visible from a distance, especially in urban areas. Look for lights with strobe modes for maximum visibility in traffic. Battery life is equally important. Be sure your chosen lights can last for your usual riding duration.

Tips: Check for waterproof ratings. Lights that can withstand rain are crucial. Regularly inspect connections and battery health for reliability. Test your lights in a safe area before heading out. Remember to adjust light angles; they should not blind other cyclists or drivers.

Tools Needed for Installing Electric Bicycle Lights

When you decide to install electric bicycle lights, it's crucial to have the right tools on hand. A simple toolkit is often sufficient. Start with a basic screwdriver set. Phillips and flat-head screwdrivers will cater to most light attachment points. Also, a pair of pliers can help tighten connections properly. Wire cutters might be necessary if you're working with integrated or complex systems.

An adjustable wrench can be useful, especially for mounting brackets. Always check if you need any additional tools based on your bicycle’s design. Consider a small level to ensure your lights are installed straight. Sometimes, extra zip ties or electrical tape might be handy for securing wiring or ensuring a clean installation.

Remember to keep safety in mind during installation. Double-check all connections and make sure the lights are tightly secured. Don’t rush the process. In the end, properly fitted lights enhance your visibility and ensure a safe ride. If anything seems off while adjusting the lights, take a moment to reassess. Getting it right can sometimes take a few tries. Every bike is unique, so your installation experience will vary. Embrace the learning process!

Step-by-Step Guide to Installing Electric Bicycle Lights

Installing electric bicycle lights is crucial for safety. A properly illuminated bike can significantly reduce accident risks. According to a study by the National Highway Traffic Safety Administration, approximately 50% of bike incidents occur at night. Visibility plays a massive role in preventing such accidents.

To install your lights, start by selecting suitable locations. Front lights should be mounted at about 1 meter high, aiming downward. Rear lights benefit from being installed on the seat post or rear rack. Use a sturdy mounting bracket to ensure stability. In some cases, amateur installations lead to lights falling during rides. This can lead to injuries or further visibility issues.

After installation, adjust the angles of the lights. They should be positioned to maximize road visibility without blinding other road users. Remember that improper alignment can cause reflections, which are often overlooked. A recent survey found that 30% of cyclists did not check their light positioning before rides. Regularly checking your light functionality is essential. Replace dead batteries promptly to ensure that your equipment is always operational.

Adjusting the Brightness and Angle of Your Bicycle Lights

When installing bicycle lights, focusing on brightness and angle can enhance your safety and visibility. Start by adjusting the brightness level. Most modern lights offer various modes, including steady and flashing. Test the different settings in a low-light environment. Make sure the brightest setting isn’t blinding to oncoming traffic. You want to be seen, but not to distract other road users.

Next, angle your lights properly. Ideally, the lights should illuminate the road ahead without glaring into the eyes of drivers or pedestrians. Find a position where your lights project a clear beam on the road while remaining low enough to avoid dazzling others. Many riders struggle with this adjustment, often placing lights too high or too low. Experimenting with different angles can help you find the sweet spot. Remember, the goal is to ensure visibility for yourself while being considerate of others in your vicinity.

Regularly checking the position and brightness of your lights is also essential. After a few rides, reassess their placement and function. Conditions can change—such as wearing different gear or dealing with varying weather. Poor visibility due to misalignment can lead to accidents. Take a moment to reflect on your setup to improve your safety on the road.

Safety Tips for Using Electric Bicycle Lights at Night

When riding an electric bicycle at night, visibility is crucial. Statistics show that cyclists are more vulnerable during nighttime. In fact, the National Highway Traffic Safety Administration (NHTSA) reports that about 44% of cyclist fatalities occur after dark. Therefore, using proper lights can significantly enhance safety.

Installing front and rear lights provides essential illumination. A bright front light illuminates the road ahead, while a rear red light alerts drivers to your presence. It is advisable to choose lights with at least 200 lumens for the front and a flashing mode for the rear. This combination increases visibility. Regularly check the battery levels and replace them as needed.

Tips: Always adjust your lights to the correct angle. A misaligned light can dazzle oncoming traffic or fail to illuminate the road. Consider using reflective gear to enhance your visibility further. When riding in groups, ensure everyone uses lights to maintain collective safety. Riding without adequate lighting is a risk that can lead to serious accidents. Reflecting on your lighting setup periodically can prevent potential hazards.

FAQS

: What tools do I need for installing bicycle lights?

: A basic screwdriver set, pliers, and wire cutters are essential. An adjustable wrench can also help.

How high should I mount my front bicycle lights?

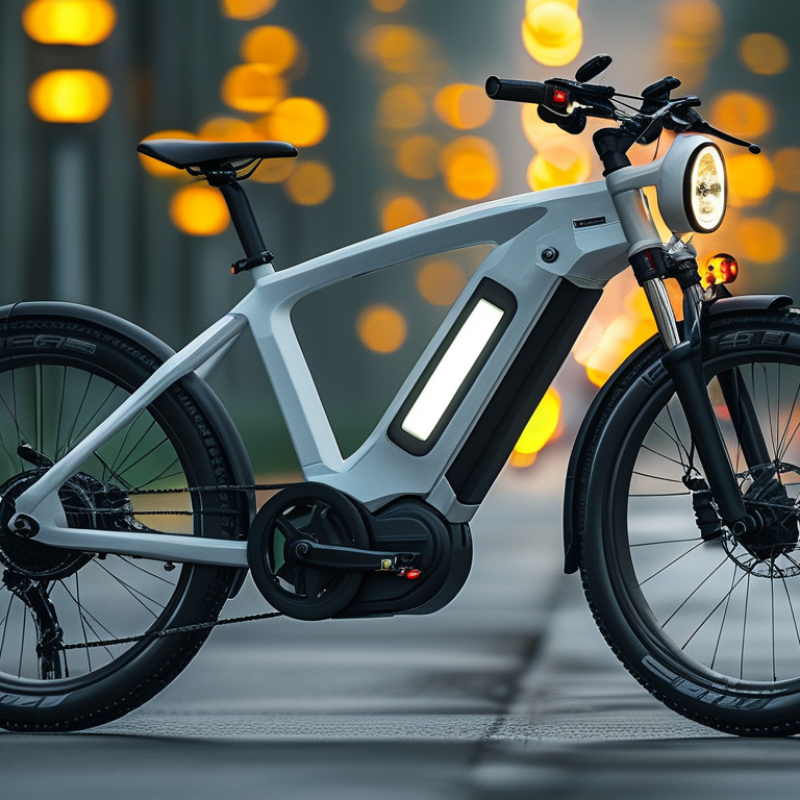
Front lights should be about 1 meter high and angled downward for optimal visibility.

What common mistakes do people make when installing lights?

Many amateur installations lead to lights falling during rides, causing visibility issues and injuries.

How can I check if my lights are positioned correctly?

Regularly assess the angle and brightness after a few rides. Adjust as needed to enhance safety.

What should I do if my lights blind oncoming traffic?

Test brightness levels in low light. Adjust the angle to avoid glare for others.

How can I secure the wiring during installation?

Use zip ties or electrical tape to keep wiring neat and secure. This prevents issues later.

Why is it important to check light functionality?

Dead batteries compromise safety. Always ensure your lights are operational before a ride.

What can I do if my lights are improperly aligned?

Take time to reassess and experiment with different angles. Finding the right position can take practice.

How often should I check my bike lights?

Regular checks are essential, especially after changing gear or weather conditions. Misalignment can lead to accidents.

What if I feel frustrated during the installation process?

It’s okay to take breaks. Reflecting on your setup can lead to better outcomes and enhance safety.

Conclusion

In the article titled "How to Install and Adjust Electric Bicycle Lights Safely?", readers are provided with comprehensive guidance on ensuring maximum safety while riding an electric bicycle at night. It begins with advice on choosing the right electric bicycle lights, emphasizing the importance of brightness and visibility. Readers are then introduced to the essential tools needed for installation, followed by a detailed step-by-step guide that simplifies the installation process.

Furthermore, the article discusses how to adjust the brightness and angle of bicycle lights effectively, allowing for optimal illumination while riding. Safety tips are also included to enhance users' awareness when using electric lights after dark. Overall, this article serves as a valuable resource for anyone wondering how to install and adjust electric bicycle lights for maximum safety, enhancing both their riding experience and security on the road.

Charlotte

Charlotte

Charlotte is a seasoned marketing professional with a deep understanding of the company's portfolio and a passion for elevating its presence in the market. With a keen eye for detail and a commitment to excellence, she ensures that our professional blog is regularly updated with insightful articles......