Night rides can feel calm until a dark bend hides a pothole, a loose dog, or a car approaching from behind. A night vision camera may record useful detail, but “night vision” alone says little about image quality. Glare from headlights, rain on the lens, shaky handlebars, and weak battery life can all affect the footage. Small details matter.
What factors should you consider when buying night vision cameras for biking? Start with low-light image clarity, stabilization, mounting security, battery runtime, weather resistance, storage, and ease of use. These features work together. A sharp sensor is less helpful if the camera slips on rough pavement or stops recording halfway home. A bright showroom sample is not proof of reliable night performance; ask how footage looks under real streetlights and in darker stretches.
Cycling transportation engineer and author John Forester wrote, “Cyclists fare best when they act and are treated as drivers of vehicles.” His point concerns safe road use, not camera selection, but it offers useful context: a camera should support awareness, never replace it. Keep your lights visible, ride predictably, and avoid checking the screen while moving. There is no perfect setup. Riders differ, and even a well-reviewed camera may disappoint in heavy rain or deep shadow. These seven tips will help you compare practical features, spot marketing claims that need testing, and choose a camera suited to your routes and riding habits.
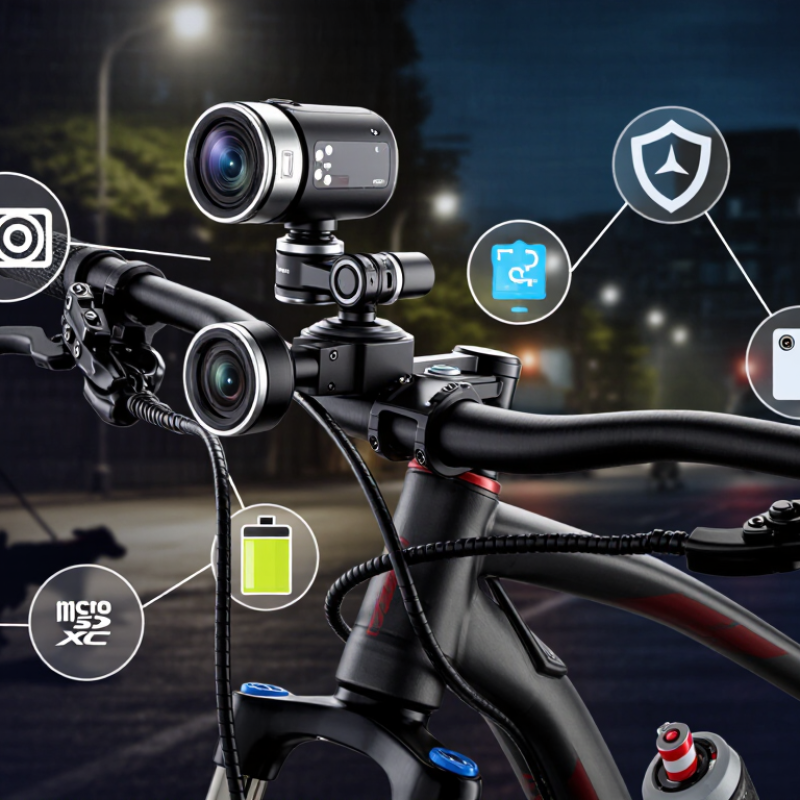
Define your night-riding and recording needs before comparing cameras. A ten-minute commute needs different equipment from a two-hour trail ride. Note your route, average speed, weather, and available street lighting. NHTSA’s Traffic Safety Facts 2022 reported 1,105 bicyclist deaths in the United States. That figure makes visibility and reliable evidence practical safety concerns, not decorative features.
For dark streets, prioritize strong low-light performance, stable footage, and a wide viewing angle. A front camera may document road hazards, while a rear camera can capture approaching traffic. Look for enough battery life to exceed your usual ride by 30 percent. Check storage capacity and automatic file protection after a sudden stop. The National Highway Traffic Safety Administration recommends visibility equipment and advises cyclists to remain alert, but a camera cannot replace lights, reflective clothing, or attentive riding. It records events. It does not prevent them.
Your recording purpose should guide image quality. For route review, 1080p may be sufficient. For identifying distant road details, higher resolution can help, but it usually consumes more storage and power. Weather sealing matters during cold, wet commutes. Test the mount on rough pavement before trusting it at night. I once valued sharp footage more than battery endurance; that was poor judgment. A dark, empty file is useless. Also consider privacy, local recording rules, and whether continuous recording is necessary. The best purchase may be less impressive, but better matched to your actual ride.
This chart uses a practical 1–5 priority scale for three common riding situations. Commuters generally need strong low-light performance and reliable stabilization, while trail riders place greater importance on a wide field of view, battery life, and weather resistance. Choose a camera according to your usual route length, lighting conditions, recording duration, and mounting position.
Understanding night vision technology is essential when buying a camera for biking. NHTSA’s Traffic Safety Facts 2022 recorded 1,105 bicyclist deaths in the United States. Good visibility matters, but every camera has limits.
Infrared night vision uses invisible light to brighten dark paths. It works well on unlit roads and usually needs less power. However, reflective signs, license plates, and wet surfaces may appear overly bright. Starlight sensors use larger pixels and capture more natural detail from available light. They often perform better near streetlamps. Thermal imaging detects heat, not visible shapes. It can reveal a person behind darkness, but it may lose road markings and bicycle details.
Check more than advertised resolution. A 4K image can still look poor at night. Look for a low-light sensitivity rating, wide dynamic range, and stable frame rates above 24 frames per second. The EMVA 1288 standard offers a useful framework for comparing image-sensor performance, including noise and sensitivity. I still find lux ratings difficult to compare because testing conditions vary. That is an important weakness.
Infrared range also needs practical testing. A claimed distance may shrink in rain, fog, or dusty air. Choose adjustable infrared strength when possible. Test the camera beside your handlebars, not only indoors. Battery drain can increase sharply with infrared illumination and high-resolution recording. A compact camera may be safer to carry, yet its smaller battery could disappoint on a long ride.
When comparing night-vision cameras for biking, judge footage on a familiar route, not a bright showroom screen. Look for readable details: a curb edge, a dark jacket, and a road sign at riding distance. Resolution alone can mislead; aggressive noise reduction may smear moving cyclists into soft shapes.
The NHTSA’s 2022 Traffic Safety Facts report notes that about half of motor-vehicle traffic fatalities occurred in dark conditions. That does not measure camera quality, but it underlines why clear nighttime footage matters. Check sample clips recorded in genuinely dim conditions, and compare how well they preserve detail without artificial sharpening.
Field of view is a trade-off. A wider view can capture more of an intersection, but objects near the edges may look smaller or distorted. Compare footage from the same handlebar position, especially when cars approach from the side. Then test low-light performance on a quiet evening route: note whether headlights wash out the scene, shadows hide potholes, or motion creates streaks.
Look for exposure changes between streetlights, not just a manufacturer’s brightest demonstration clip. Also check whether the camera records usable footage while the bike vibrates. Small details matter. Battery life and mounting stability affect whether you can capture a whole ride. I would not trust one test ride as proof; weather, speed, and lighting change the result.
A night camera is only useful if its mount stays steady. Check that the clamp fits your handlebar and cannot rotate when you brake or hit a pothole. Try the setup on a short ride; a tiny wobble can turn useful footage into blur. Keep the lens clear of cables and your hands.
Battery claims can vary with resolution, screen use, and infrared lighting. Test recording time in the settings you plan to use, not just standby time. Small details matter. For weather protection, look for an IP rating tested under IEC 60529. Check what the specific rating covers: splash resistance is not the same as protection against immersion. After rain, inspect ports and seals, and let the camera dry before charging.
Storage fills faster at higher resolutions, so check maximum card capacity and whether the camera records in loops. Save important clips before older files are overwritten. The U.S. National Highway Traffic Safety Administration reported 1,105 bicyclist deaths in its 2022 Traffic Safety Facts: Bicyclists and Other Cyclists. That figure does not mean a camera prevents crashes, but it shows why reliable recording may matter. Test it outside. Night footage can look bright on a small screen yet lose detail in shadows, so review a sample on a larger display before relying on it.
Before buying a night vision camera for biking, check how it handles low light without blinding others. A useful safety feature is a small status light you can cover or switch off while riding. Look for secure mounting, clear controls you can operate with gloves, and a field of view that captures the road without distracting you. Test the mount on a short ride over rough pavement. A camera that shifts near a pothole is not dependable.
Tip: Check local recording rules before recording streets, trails, or conversations. Requirements can differ by location, and rules may treat audio and video differently. Check official local guidance, especially if footage could include identifiable people or private property. When uncertain, disable audio and avoid filming into homes or enclosed spaces. Keep clips for personal safety, and learn how local rules address storing or sharing them.
Review how the camera records and protects footage. Loop recording may overwrite older clips, so confirm how to preserve an incident file. Check battery life in cold weather, storage limits, and whether files can be reviewed without an internet connection. Keep the device firmly attached, but do not let setup distract you from traffic. I once thought a bright display would help; it mostly pulled my eyes from the road. Use a brief test ride, then adjust.
Infrared brightens unlit paths using invisible light. Starlight sensors show more natural detail near streetlamps. Thermal imaging detects heat, not road markings.
No. A 4K image may still look noisy or blurry. Check low-light sensitivity, dynamic range, and frame rates above 24 frames per second.
Look for curb edges, dark clothing, potholes, and road signs. Headlights should not erase nearby details. Shadows still matter.
A wider view captures more of an intersection. However, edge objects may appear smaller or distorted. Test approaching traffic from the side.
Mount the camera beside your handlebars. Record during rain, fog, and dusty conditions when possible. Claimed range may shrink.
Infrared lighting and high-resolution recording can drain batteries quickly. Test recording time using your real settings, not standby mode. Small batteries disappoint.
Use a clamp that fits tightly and resists rotation. Test it over potholes and during braking. Tiny movement can create heavy blur.
Check the specific weather-resistance rating and its testing conditions. Splash protection does not guarantee immersion safety. Higher resolution fills storage faster, so save important clips before looping overwrites them.
Choosing a night vision camera for biking starts with identifying how and where you ride, what you want to record, and whether you need footage for navigation, training, or documenting your trips. What factors should you consider when buying night vision cameras for biking? Begin by comparing available low-light technologies and looking closely at image clarity, field of view, and performance in changing conditions such as streetlights, shadows, and darkness. A wider view may capture more of the route, while clear, stable footage can make important details easier to see.
Also consider practical fit and reliability: the camera should mount securely without interfering with your riding, offer enough battery life for typical trips, and withstand expected weather. Check how recordings are stored and how much space is available, as well as whether useful safety features suit your needs. Before recording, review local rules and respect the privacy of others. Balancing image quality, durability, convenience, and responsible use will help you choose a camera that supports safer, more useful nighttime rides.

Geek Flashlight