5 Best Lumen Levels for Cycling at Night

Time:2026-11-01 Author:Liam
0%

Choosing a bike light is not a contest to find the biggest lumen number. The right output depends on speed, street lighting, weather, and whether you need to be seen or to see the road. A small front light can help drivers notice you on a lit street; an unlit path needs a beam that reveals potholes, gravel, and bends farther ahead. Aim matters, too. A powerful beam pointed into someone’s eyes can make a ride less safe.

What is the ideal brightness level for a flashlight used for cycling? There is no single answer, and “flashlight” is not always the best comparison: cycling lights need a stable mount and a useful beam pattern. As a practical starting point, this guide compares modest outputs for lit urban streets, mid-range levels for darker roads, and brighter options for fast or poorly lit routes. These are starting ranges, not guarantees. A well-shaped 400-lumen beam may be more useful than a poorly focused light rated much higher.

The numbers also need context. ANSI/PLATO FL 1 provides standardized methods for reporting flashlight performance, including output and runtime; it does not prescribe a bicycle-light setting. NHTSA’s 2022 Traffic Safety Facts: Bicyclists recorded 1,105 bicyclist fatalities in the United States, underscoring why nighttime visibility deserves careful attention—not proving that any particular lumen level prevents crashes. That matters. Battery drain, glare, and beam placement are easy to overlook. Even this guide’s suggested bands need adjustment for your route. Check the beam on a quiet stretch before relying on it in traffic.
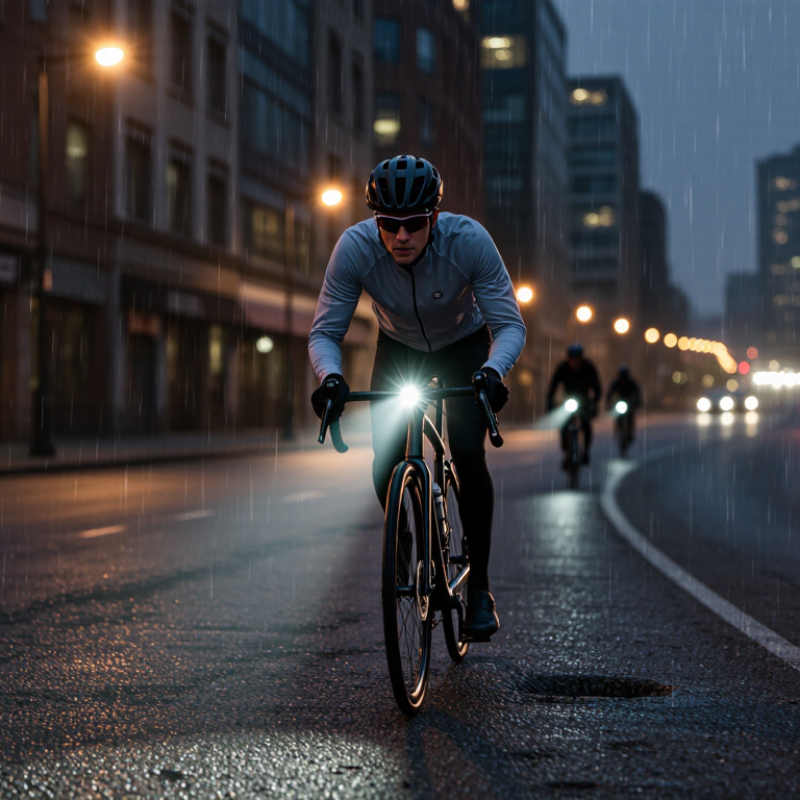
5 Best Lumen Levels for Cycling at Night

100–200 Lumens: Basic Visibility on Well-Lit Streets

On a street with steady lamps, a 100–200-lumen front light can help make a cyclist noticeable without flooding the road. It is a modest setting, not a guarantee of visibility. Aim the beam slightly down, so it marks your position and reveals nearby pavement without shining directly into drivers’ eyes. In practice, this range suits familiar, well-lit blocks where potholes and road edges remain visible. That is enough—sometimes.

A lumen number does not tell the whole story. Beam shape, lens clarity, mounting angle, rain, and street lighting all affect what reaches the road. A narrow beam may feel dimmer than a wide one at the same output. If shadows hide a curb or a dark gap appears between streetlights, increase the output or use another suitable light. Do not assume 200 lumens covers every condition. Check that bumps have not shifted the beam, and use reflective clothing or wheel reflectors as extra cues. They help, but they do not replace a working front light. I still find lumen choices a little blunt; the road often matters more than the label.

300–500 Lumens: Everyday Riding Through Urban Areas

On familiar city streets, 300–500 lumens is often a useful range for everyday riding. Streetlights, shop windows, and passing traffic already provide some visibility, so a cyclist usually needs a clear path rather than a beam that floods every building. Around 300 lumens may suit well-lit routes at moderate speeds. Closer to 500 can help on darker blocks or when wet pavement makes edges harder to read. Not a magic number.

Lumens alone do not tell the whole story. Beam shape and aim matter: a focused beam can reveal potholes without shining directly into another person’s eyes. Point the light slightly downward, and check its angle after hitting a curb or locking the bike outside. Keep a rear light visible, too. A steady front beam can help you read the road, while a gentle flashing mode may make you easier to notice in daytime traffic. Avoid rapid, dazzling flashes at night.

Battery performance can dip in cold weather, and maximum output may last only briefly. Check the light’s runtime at the setting you actually use, not just its brightest setting. I sometimes assume a familiar route will be bright enough, then find a shadowed junction that proves otherwise. Adjust the output to the street, your speed, and the weather.

600–800 Lumens: Greater Reach on Dimly Lit Roads

A 600–800-lumen front light can make a dimly lit road easier to read without turning the ride into a wall of glare. At this output, the beam can reveal cracks, gravel, and wet leaves farther ahead than a modest commuter light. On a familiar route, that extra reach gives you more time to adjust your line. That matters.

Aim the beam slightly downward, with its brightest area on the road rather than at eye level. A powerful light aimed too high can dazzle approaching riders and drivers. Lumens alone do not tell the whole story; beam shape and lens design affect where the light lands. I learned that the hard way on a quiet lane: more brightness did not help when the beam scattered across the hedges.

For roads with occasional streetlights, 600 lumens may be enough, while 800 can help on darker stretches or at higher speeds. Check the stated runtime at the chosen setting, since maximum output may drain a battery quickly. A lower mode can work near traffic, then switch up where the road gets darker. Test the setup before a long ride, and carry a backup light if the route is remote.

1,000–1,500 Lumens: Confident Cycling on Dark Routes

On an unlit route, 1,000–1,500 lumens can reveal potholes, loose gravel, and bends before they become urgent. The exact number matters less than the beam’s shape. A focused beam helps you see farther, while a softer spread shows the road edges. That difference is easy to miss. A bright light with a narrow hotspot may leave nearby hazards in shadow.

I’d test the light on a quiet, dark stretch before relying on it for a longer ride. Check that the mount stays steady over bumps, and angle the beam toward the road rather than other people’s eyes. Keep the battery’s runtime in mind; maximum output may not last the whole trip. I still catch myself trusting the lumen figure too much. Beam quality and battery performance can vary, even between lights with similar ratings. A spare lower setting can help preserve charge when the route gets brighter or traffic increases.

2,000+ Lumens: High Output for Remote Trails and Roads

On remote trails and unlit roads, a light rated at 2,000 lumens or more can reveal loose gravel, potholes, and branches well ahead. That is a lot. High output helps at speed, but it does not automatically make a ride safer. A poorly aimed beam can dazzle oncoming riders or drivers, while a wide beam may waste battery lighting nearby trees. Choose a light with adjustable settings and a beam pattern suited to the route. I have found that a steady medium setting often works better than running maximum power throughout the ride.

Tips: Aim it carefully. Point the brightest part of the beam toward the road, not eye level. Test before leaving. Check the beam on a quiet stretch, and carry a lower-power option for shared paths or built-up areas. Secure the mount; bumps can shift the beam more than expected.

At 2,000-plus lumens, battery life and heat matter as much as peak brightness. Cold weather, long climbs, and old batteries can reduce runtime, so check the maker’s runtime guidance and leave a reserve. A spare light is sensible on a remote route. Still, I would not choose the brightest setting by default; glare and short runtime can become their own problems.

5 Best Lumen Levels for Cycling at Night — 2,000+ Lumens: High Output for Remote Trails and Roads

Front Light Output Best For What to Expect Practical Considerations
100–300 lumens Well-lit streets and short urban rides Helps you remain visible and provides some illumination where street lighting is consistent. May not reveal road hazards early enough on dark, unlit routes. Use a rear light as well.
300–600 lumens City riding with occasional unlit sections Offers a useful balance of forward visibility and visibility to others for many everyday rides. Choose a beam pattern suited to the road, and angle the light down to avoid dazzling other road users.
600–1,000 lumens Unlit roads and moderate-speed riding Provides a brighter view of the route and more time to notice surface changes and obstacles. Actual visibility depends on beam shape, mounting position, weather, and riding speed—not just the lumen rating.
1,000–2,000 lumens Fast descents and technical trails High output can illuminate more of the trail ahead, especially when paired with a wide, well-shaped beam. Higher settings use more power and can produce more heat. Check the light’s runtime at the mode you plan to use.
2,000+ lumens Remote trails and very dark roads Very high output can help riders see farther and cover a wider area in demanding, unlit conditions. Use high output selectively, keep the beam aimed responsibly, and carry enough battery capacity or a backup light for the full ride.

Tip: Lumens measure total light output, not how effectively the beam lights the path. Beam design, mounting angle, speed, weather, and local lighting conditions all affect real-world visibility. Check local lighting rules before riding.

FAQS

When is a 100–200-lumen front light suitable?

It can suit familiar streets with steady lighting and visible road edges. It is modest.

What range works for everyday city riding?

Around 300–500 lumens often works on urban streets. Use more when blocks are darker or wet pavement hides road edges.

Do lumens alone show how well a light will work?

No. Beam shape, lens clarity, mounting angle, rain, and street lighting all affect what you can see.

How should I aim my front light?

Point it slightly downward to light nearby pavement without shining directly into drivers’ eyes.

When should I increase the light output?

Raise it when shadows hide a curb or gaps appear between streetlights. A familiar route can still have dark junctions.

Should I use a rear light as well?

Yes. Keep it visible, and consider reflective clothing or wheel reflectors as extra cues.

Is flashing mode suitable for every ride?

A gentle flash may help in daytime traffic. Avoid rapid, dazzling flashes at night.

How can cold weather affect my light?

Battery performance can drop, and maximum output may last only briefly. Check runtime at your usual setting.

What should I check after hitting a curb?

Make sure the beam still points slightly downward. A small shift can change where the light falls.

Conclusion

What is the ideal brightness level for a flashlight used for cycling? It depends on where and when you ride. On well-lit streets, 100–200 lumens can help you remain visible without producing more light than necessary. For everyday urban rides, 300–500 lumens offer a useful balance, while 600–800 lumens provide greater reach on dimly lit roads.

For dark routes, 1,000–1,500 lumens can help you see farther and ride with more confidence. Remote trails and unlit roads may call for 2,000 lumens or more, although the beam should be aimed thoughtfully to avoid dazzling other road users. Choose a brightness level that suits your route, riding speed, and surrounding light, and remember that visibility to others matters as much as seeing the path ahead.

Liam

Liam

Liam is a dedicated marketing professional with a profound expertise in the industry, where he excels at highlighting the unique advantages of our core products. With a keen understanding of market trends and consumer needs, Liam frequently updates our company’s professional blog, providing......