Setting up bicycle lights seems simple until the first evening ride reveals small, dangerous oversights. A bright LED can still fail when its beam points toward the pavement, the battery sits loose, or the rear light disappears behind a jacket. How to avoid common mistakes when setting up LED lighting systems for bicycles? The answer begins with treating lighting as a complete system, not as a single powerful lamp.
Cycling-safety researcher John Pucher wrote, “Cyclists fare best when they act and are treated as drivers of vehicles.” That principle applies to lighting choices. Riders need to see clearly, remain visible, and avoid dazzling others. A front lamp should illuminate several metres ahead without shining directly into approaching eyes. The rear lamp should remain visible from different angles. Mounts must stay firm on rough roads, while cables and USB ports need protection from rain.
Details matter.
Check the beam after dark. Stand several metres away and inspect its height. Test every light with the riding position, not while holding the bicycle upright. Many riders forget that a helmet-mounted lamp moves constantly, creating distracting flashes. I have also seen careful cyclists install a fully charged light, then ignore its low-battery indicator before leaving home. That mistake feels minor until the road becomes unlit.
This guide examines mounting height, beam direction, battery planning, weather resistance, daytime visibility, and routine testing. It also questions a common assumption: brighter is not always safer. A balanced setup usually performs better than an overloaded handlebar covered with poorly aimed lights.
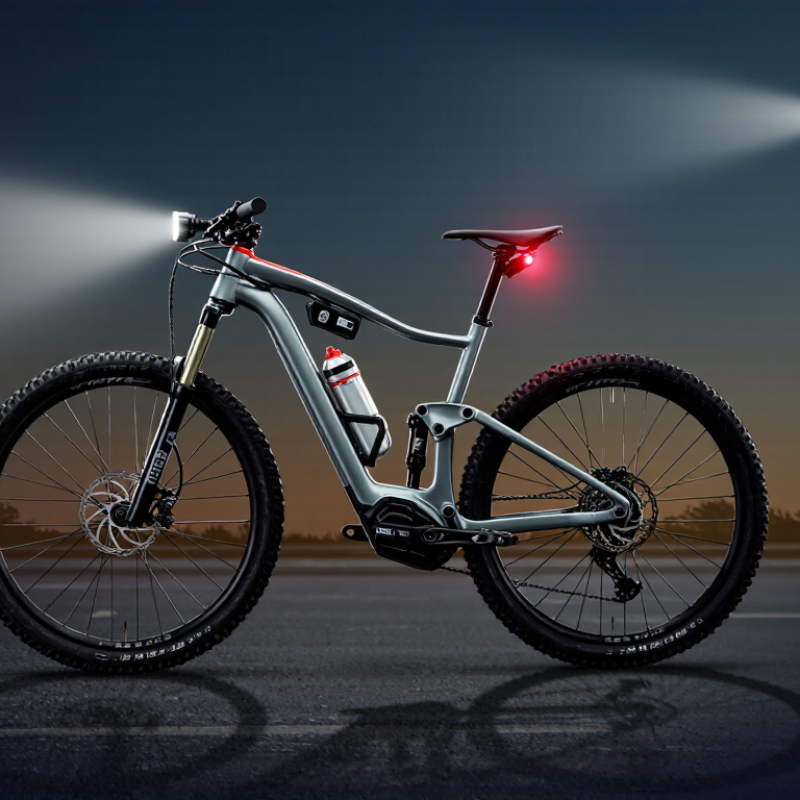
A reliable LED bicycle setup starts with the route, not the brightest lamp available. On familiar city streets, 100–200 lumens usually provides useful visibility without harsh glare. This range works well when streetlights reveal potholes, parked cars, and turning traffic. I have found that a wide, steady beam feels safer than a narrow flash. Keep the light pointed slightly downward. Aim matters.
Unlit trails demand more output. Choose 400+ lumens when roots, loose gravel, and sudden bends can hide beyond the front wheel. Higher output is not automatically better. A poorly shaped beam can waste light above eye level and distract other riders. Test it at dusk. Check the beam while wearing your usual helmet and gloves. Battery claims also need caution; cold weather, high modes, and aging cells reduce runtime. I once trusted a runtime estimate too much and finished a ride with a dim light. That mistake changed my setup.
Mount the lamp firmly, centered if possible, and check it after rough sections. Use a steady mode where you need detail, reserving flashing modes for daytime visibility. Rear lighting should remain visible without competing with the front beam. Clean the lens after muddy rides, and carry a lower-power backup mode. Route conditions can change quickly. Reassess output when construction, rain, or darker surfaces appear. A short test ride is more trustworthy than a specification sheet.
| Route Type | Typical Riding Conditions | Recommended Front Output | Recommended Rear Output | Beam and Mode Guidance | Common Setup Mistake | Better Setup |
|---|---|---|---|---|---|---|
| Well-Lit Urban Streets | Streetlights, low traffic speeds, and clear visibility of the road surface. | 100–200 lm | 20–50 lm | Use a steady or low-flash front mode with a broad, controlled beam. | Using a very bright flashing beam that distracts approaching road users. | Aim the beam slightly downward and use a moderate setting for being seen without excessive glare. |
| Dim Suburban Roads | Limited street lighting, occasional traffic, and darker road edges. | 200–400 lm | 30–80 lm | Choose a beam that illuminates the lane and road edge; use a steady front mode. | Relying on a small safety light that does not reveal potholes or uneven surfaces. | Use enough output to identify hazards while keeping the beam below drivers’ eye level. |
| Unlit Cycle Paths | Little or no artificial lighting, moderate riding speed, and possible pedestrians. | 300–600 lm | 30–80 lm | A medium-width beam helps reveal the path ahead; reduce brightness around other users. | Pointing the lamp straight ahead, creating glare for oncoming cyclists. | Set the cutoff below eye level and switch to a lower mode when passing others. |
| Paved Rural Roads | Dark surroundings, limited ambient light, and higher-speed riding. | 400–800 lm | 50–100 lm | Use a focused beam with adequate side visibility and a steady rear mode. | Choosing maximum brightness without checking battery runtime. | Select a mode that covers the complete ride and carry a charged backup or spare battery where practical. |
| Gravel Roads | Loose surfaces, vibration, uneven edges, and limited ambient light. | 500–900 lm | 50–100 lm | A wider beam improves peripheral awareness; secure the light against vibration. | Mounting the lamp loosely so the beam shakes or moves away from the route. | Tighten the mount, check alignment before riding, and use a beam wide enough to show surface changes. |
| Technical Off-Road Trails | Very dark terrain, roots, rocks, turns, and frequent changes in elevation. | 800–1,500+ lm | 50–100 lm | Use a wide, consistent beam; a handlebar light plus a helmet-mounted light can reduce blind spots. | Using a narrow beam that leaves turns and obstacles outside the illuminated area. | Use a wide beam, secure both mounting points, and lower the output near other trail users. |
| Daytime Visibility on Roads | Bright daylight where the main goal is to attract attention to the cyclist. | Day-flash mode | 30–100 lm | Use a conspicuous pulse pattern where permitted; avoid aiming the front light at eye level. | Using a steady, low-output light that blends into the background. | Use a daytime-visible mode and position the light so it is noticeable without causing glare. |
| Mixed Route: City to Trail | Changing conditions from lit streets to dark paths during one ride. | 400–800 lm | 30–80 lm | Use multiple brightness levels and adjust output when the surroundings change. | Leaving the light on maximum power throughout the entire route. | Use a lower setting in town and increase output only when entering darker sections. |
| All Routes | Any ride where reliable visibility and predictable operation are important. | Route-dependent | Route-dependent | Check alignment, attachment, charging status, and controls before departure. | Assuming the advertised maximum output equals the usable output for the entire ride. | Review runtime at the selected mode, clean the lens, and perform a short pre-ride light test. |
Aim the brightest part slightly below approaching riders’ eye level. This reduces glare and preserves road contrast.
Mount the light firmly and keep it centered. Stand several metres away, then inspect where the brightest area lands.
You should see pothole edges, leaves, and painted markings. A bright white patch should not hide those details.
A lower beam often reveals more surface detail on dark roads. However, aiming too low can reduce distance visibility.
No. Runtime testing commonly ends when output reaches about ten percent of its starting level.
Use the mode planned for real rides. Compare the beam against a fixed wall every thirty minutes.
No. Leave extra capacity for cold weather, battery aging, traffic, and wet pavement.
Shake the bicycle gently and watch for twisting or rattling. Ride slowly over uneven ground, then inspect the angle again.
An IPX4 rating protects against splashes from different directions. It does not protect against immersion or flooding.
I sometimes tightened the mount indoors and trusted it too quickly. Vibration later changed the beam angle, so early rechecks matter.
How to avoid common mistakes when setting up LED lighting systems for bicycles? Start by matching the light output to your route. Around 100–200 lumens is generally suitable for well-lit streets, while trails and darker paths may require 400 lumens or more. Make sure the bicycle is clearly visible with a white front light, a red rear light, and side reflectors that provide visibility from multiple angles. Aim the front beam below eye level to reduce glare for other road users while maintaining enough contrast to identify obstacles and changes in the road surface.
Runtime should be evaluated using the ANSI FL1 measurement approach, with planning based on when brightness falls to approximately 10% of the original output. Choose a practical operating time for each trip and recharge before riding. Finally, secure every mount firmly, check that the light has at least IPX4-level water resistance, and test the setup before departure. A short shake and weather check can help reveal loose fittings or weak protection before they become safety problems.

 Geek Flashlight