Reliable diving lights do more than illuminate a reef, wreck, or narrow cave passage. They protect visibility when depth, darkness, and cold water reduce your options. This guide, “2026 Top Diving Light Cleaning and Maintenance Guide,” explains How to properly clean and maintain underwater diving lights? The answer begins with disciplined care before and after every dive.
John R. Clarke, a marine equipment service engineer with experience inspecting underwater lighting systems, says, “A light is only dependable when its seals receive the same respect as its electronics.” His point is easy to miss. Salt crystals can hide around threads, switches, and charging contacts. A tiny grain of sand may damage an O-ring during closure. Rinse the light with fresh water, not merely a quick splash. Use a soft brush around grooves, then dry the housing with a lint-free cloth.
Small details matter.
Inspect the lens for scratches, haze, or trapped moisture. Check O-rings for flattening, cuts, or stiffness. Apply only the lubricant recommended by the manufacturer. Too much grease can attract grit and create a false sense of security. Rechargeable batteries also need careful storage, especially after repeated cold-water dives. Follow the model’s charging instructions and never ignore swelling, unusual heat, or a chemical smell.
No checklist is perfect. I have seen clean-looking lights fail because moisture stayed beneath a contact cap. That uncomfortable lesson deserves attention. Record service dates, rinse times, and battery behavior. Replace questionable seals before a dive, rather than testing them at depth. Manufacturer instructions remain the final authority, because light designs, materials, and pressure ratings differ.
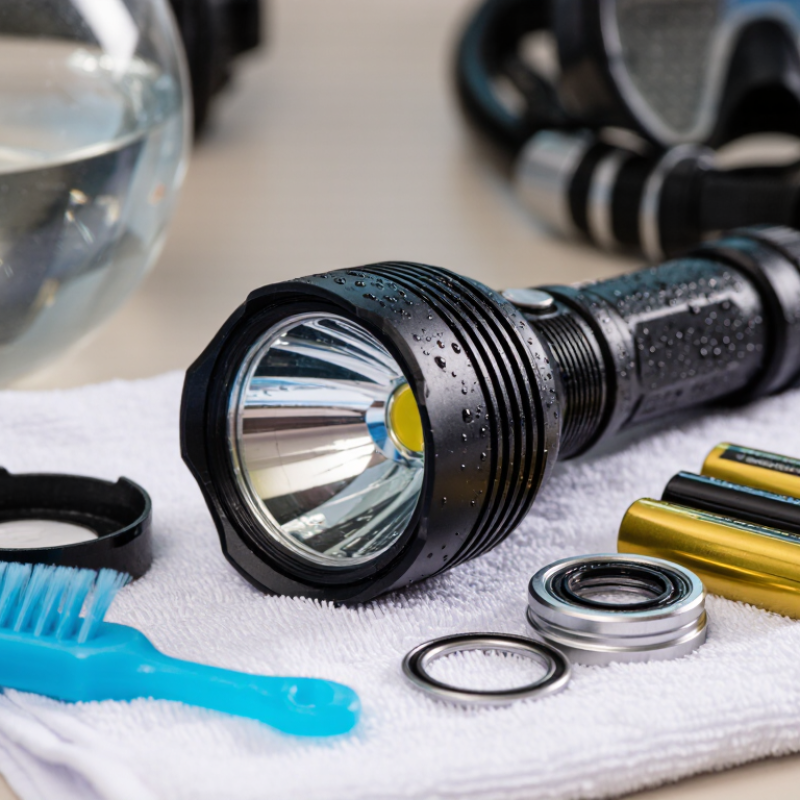
A diving light depends on several small components working together: the lens, housing, battery compartment, switch, contacts, and O-rings. Each part needs a different cleaning approach. After every dive, rinse the assembled light with fresh water. Salt crystals can hide around the switch and thread grooves. Use a soft cloth and mild soap for oily residue. Avoid abrasive pads, strong solvents, and high-pressure sprays.
Remove the batteries before deeper inspection. Check the contacts for white deposits, dark marks, or moisture. Clean light corrosion with a dry cotton swab, then let the compartment dry completely. Never scrape aggressively. The metal may look stronger than it is. Examine the lens for fine scratches, especially near the beam center. A scratched lens can scatter light and reduce visibility underwater. Wipe it with a clean microfiber cloth.
O-rings deserve careful attention. Remove them with a plastic tool, not a sharp blade. Wash each seal, inspect it for flattening or cuts, and apply only the lubricant recommended for that material. Too much grease attracts grit. The threads also need cleaning before reassembly. Keep them dry unless the maintenance instructions require lubrication. A rushed rinse is a common mistake. The light may appear clean while sand remains inside the seal channel. Store the lamp open and dry, with batteries removed when it will not be used for an extended period. Check the instructions after each season, because sealing materials and charging systems can differ.
Rinse the assembled light in fresh water for several minutes. Gently operate the buttons underwater. Use a soft, lint-free cloth. Avoid high-pressure sprays, which can push water past seals.
Check the lens, housing, switch, threads, charging contacts, battery compartment, and O-rings. Look for sand, moisture, scratches, white deposits, dark marks, or cracks. Small defects matter.
Use a clean microfiber cloth. Remove sand with a soft brush first. Never use abrasive pads, metal tools, or strong solvents. Fine scratches can scatter the beam underwater.
Remove each O-ring with a plastic pick, not a blade. Wash it and inspect for cuts, flattening, stretching, or trapped hair. Apply only a thin layer of approved silicone lubricant.
Excess grease attracts grit. Sand can remain inside the seal channel. The light may look clean but still leak. Less is safer here.
Remove the batteries immediately. Check for moisture, white residue, or dark marks. Wipe light corrosion with a dry cotton swab. Let the compartment dry completely, and stop using the light if corrosion continues.
Rinse it after every dive. Test it before every dive. Perform a deeper inspection monthly after saltwater use. Inspect terminals, threads, seals, and mounts every three months.
Store it open and completely dry in a shaded, ventilated place. Remove the batteries if unused for more than one week. Keep it away from heat and direct sunlight. Dry storage matters.
Check brightness, beam stability, charging status, switches, seals, and physical damage. Test the reassembled light in a shallow container. Do not assume a water-resistance rating allows unlimited depth.
Stop if it flickers, becomes hot, shows corrosion, or contains water. Replace damaged seals before use. Seek qualified service when the cause is unclear. I once ignored a stiff switch. That was a poor decision.
How to properly clean and maintain underwater diving lights? Begin by understanding the light’s main components, including the lens, housing, switches, battery compartment, O-rings, and charging contacts, since each part requires different care. Before cleaning, disconnect the power source, remove batteries when possible, work in a dry, well-lit area, and check for heat, damage, or trapped pressure. Rinse the light with fresh water to remove salt, sand, and residue, then gently clean the exterior and lens with a soft cloth and mild soap. Avoid abrasive tools, harsh chemicals, and excessive water pressure.
After cleaning, inspect the lens, threads, seals, and O-rings for cracks, deformation, or debris. Dry all parts completely, apply a thin layer of compatible silicone lubricant to the seals, and reassemble the light carefully without overtightening. Test its operation and waterproof integrity in a safe manner before diving. Store it in a cool, dry place with batteries removed if appropriate, and follow a routine schedule for rinsing, inspection, lubrication, charging, and functional testing.

 Geek Flashlight